The desire to remain in our homes as we age, coupled with the need for greater accessibility and convenience, is reshaping how we think about multi-story living. For homeowners in existing properties, adding an elevator might seem like a complex dream, especially when interior space is at a premium. However, there's a practical and increasingly popular solution: installing a residential elevator on the exterior of your home.

At Mobility123.com, we specialize in accessibility solutions, and we've seen firsthand how an exterior elevator can transform a home. It not only provides seamless access between floors but also adds significant convenience and can increase your property's value. This comprehensive guide will walk you through the entire process, from initial concept to final inspection, focusing on what's required for an exterior installation on an existing home.
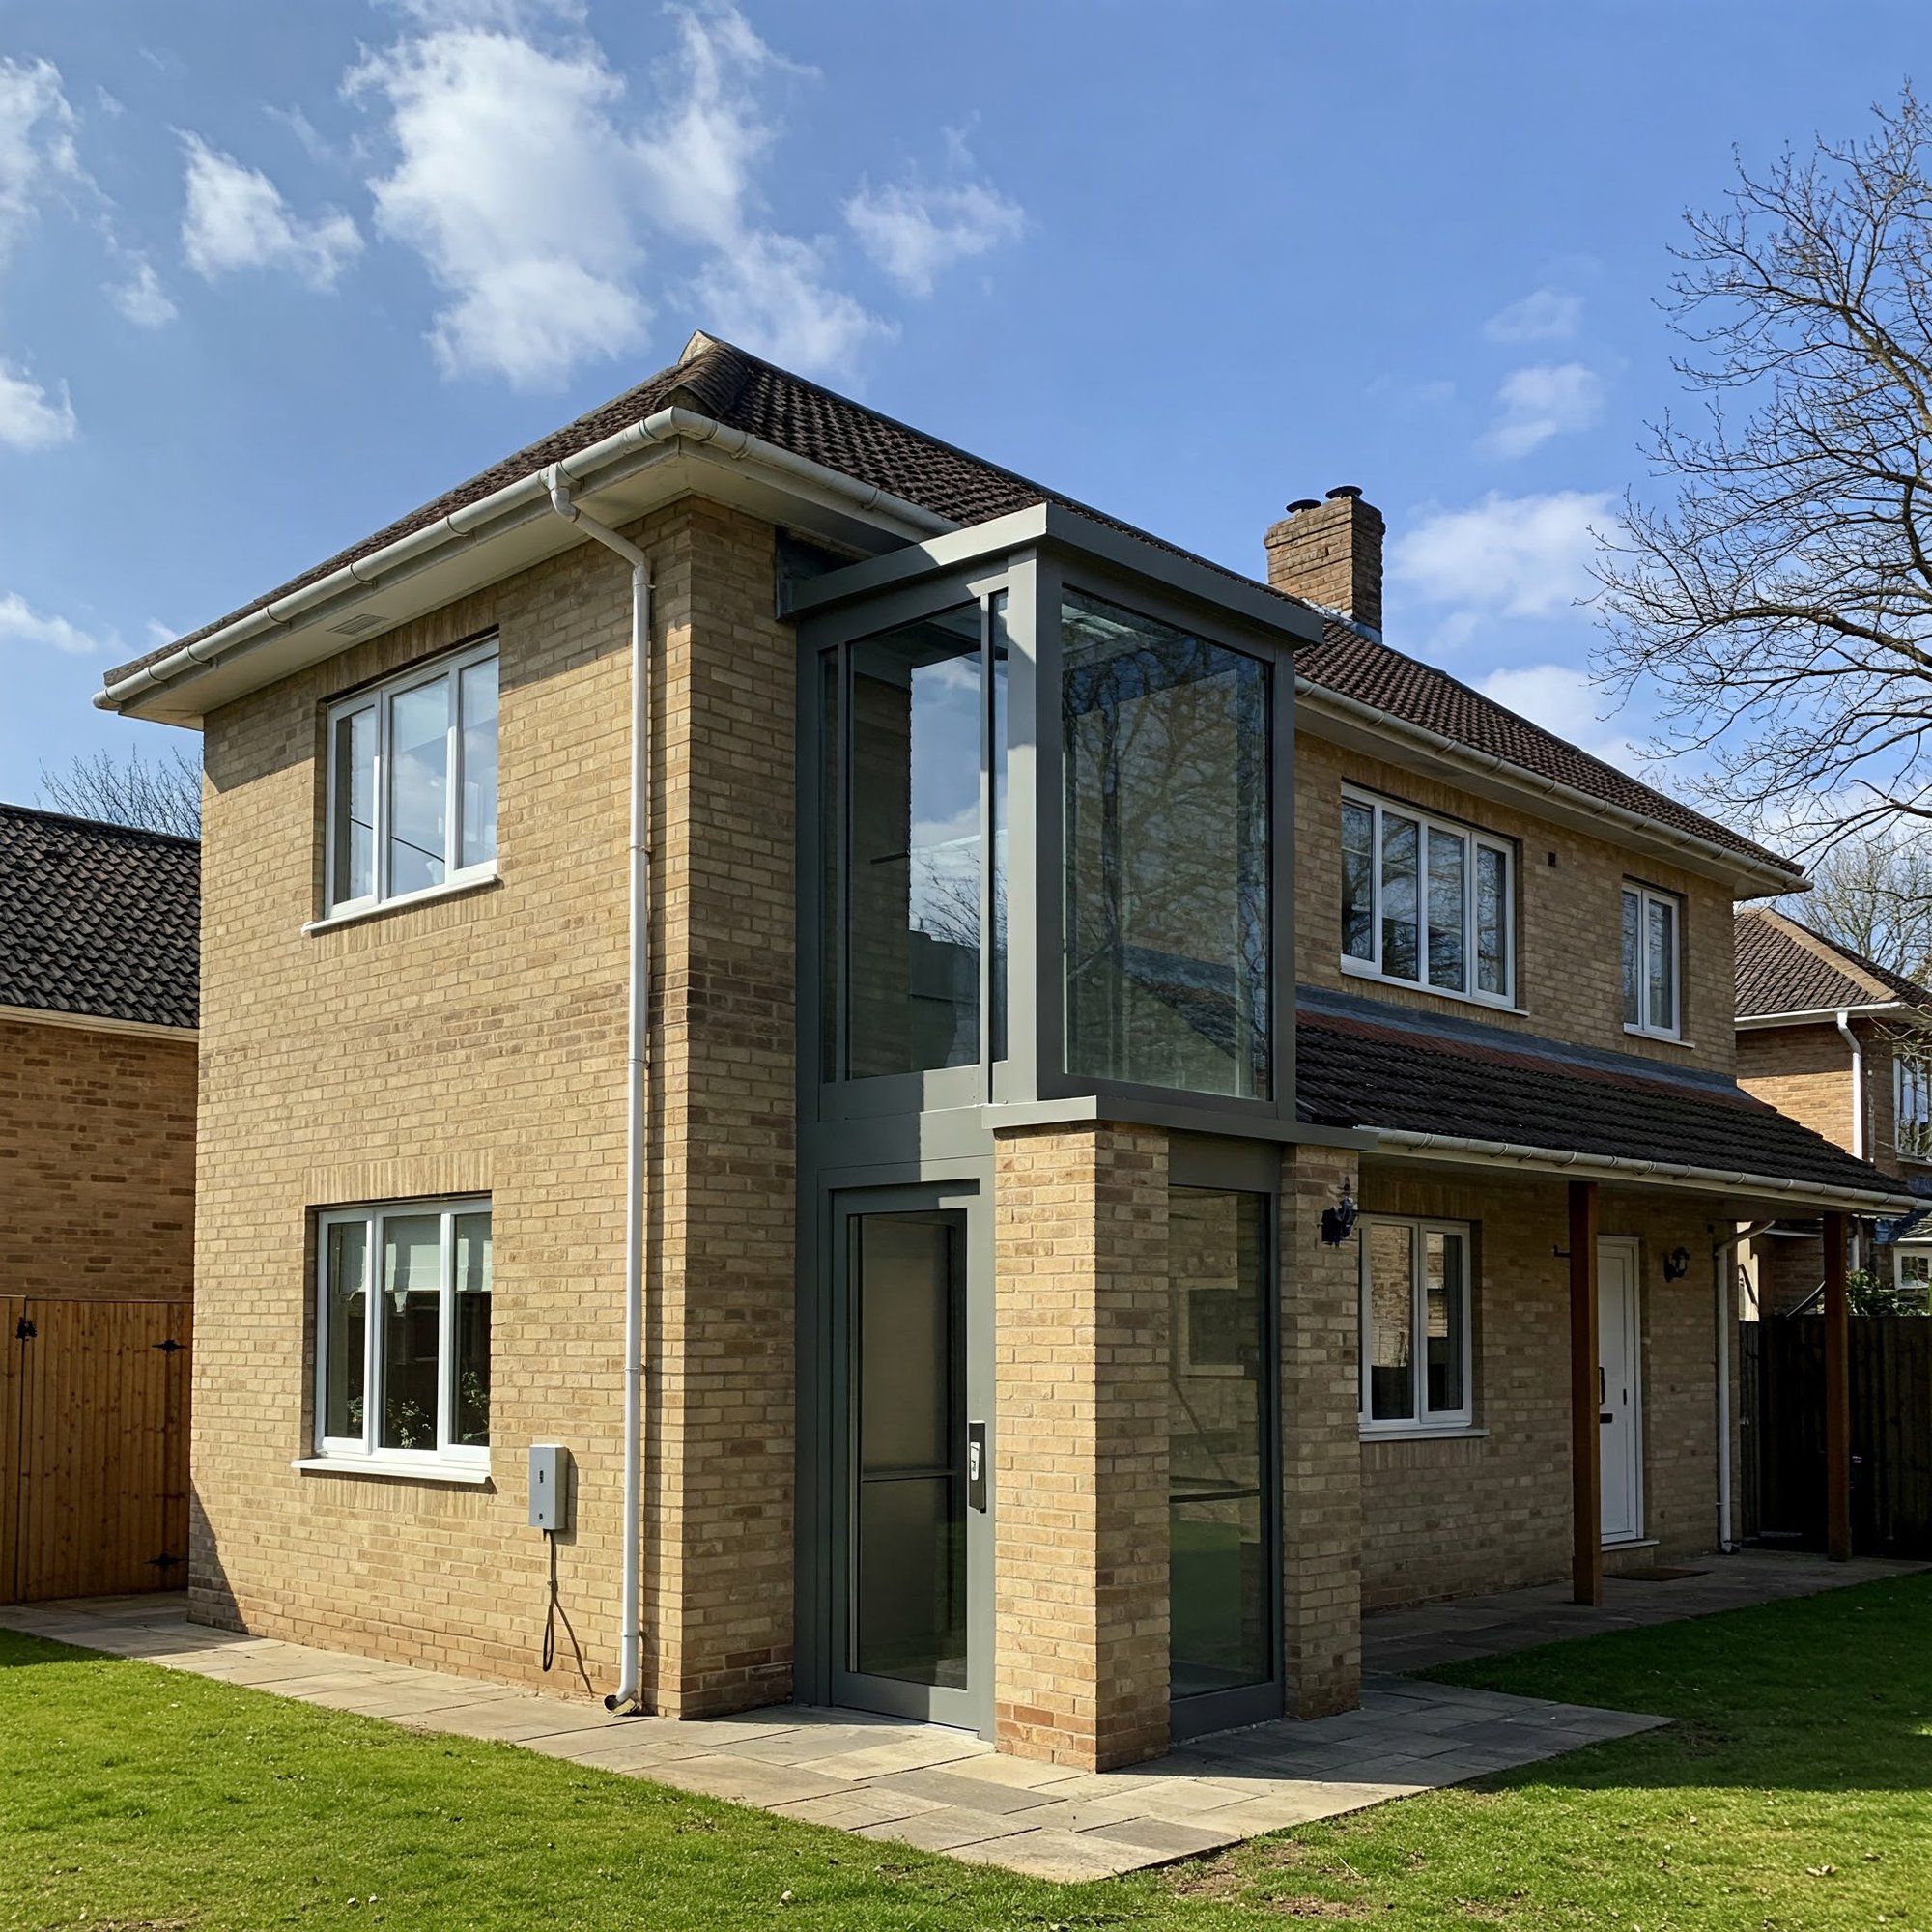
Why Choose an Exterior Elevator Installation?
When retrofitting an elevator into an existing home, interior space is often the biggest constraint. Stacked closets or dedicated open areas might not be available or practical. An exterior installation overcomes this by:
- Preserving Interior Layout: Your existing floor plan remains largely untouched.
- Minimizing Interior Disruption: Most of the heavy construction occurs outside the home.
- Creating a Striking Feature: A well-designed exterior elevator shaft can be an attractive architectural addition.
Phase 1: Planning, Feasibility, and Consultation
Before any construction begins, meticulous planning is essential.
Initial Consultation: The journey starts with a consultation with accessibility experts, like the team at Mobility123. We'll discuss your needs, mobility requirements (present and future), budget, and aesthetic preferences.
Site Assessment: An elevator specialist will visit your home to evaluate potential locations for the exterior elevator shaft. Key considerations include:
- Available Space: Is there enough ground space for the elevator pit and hoistway foundation? Is there clearance for the structure itself? Typically, an area of about 25 square feet is needed, though custom solutions exist.
- Property Lines & Setbacks: Local zoning laws dictate how close structures can be built to property lines.
- Utilities: Underground and overhead utilities (water, gas, electrical, sewer, cable) must be located and potentially rerouted.
- Access Points: How will the elevator align with existing doors or windows on each floor? New openings will likely need to be created.
- Ground Conditions: Soil stability is crucial for a solid foundation.
Elevator Type Selection: Based on the assessment and your needs, you'll select the elevator type. While hydraulic elevators (requiring a machine room, often placed nearby or integrated) and traction elevators (machine often at the top or bottom) are common, the specific choice impacts construction requirements.
Phase 2: The Administrative Gauntlet – Permits, Zoning, and Approvals
This phase involves navigating the necessary paperwork and approvals, which is critical for a legal and safe installation.
Permitting: This is non-negotiable. Installing an elevator involves significant structural, electrical, and safety considerations. You will almost certainly need multiple permits from your local jurisdiction (city or county building department). These typically include:
- Building Permit: Covers the overall construction, ensuring compliance with building codes for the shaft structure, foundation, and modifications to your home (like creating new doorways).
- Elevator Permit: Specific to the elevator machinery installation, ensuring it meets safety standards (like ASME A17.1). This often requires review and inspection by a specialized elevator inspector or approved third-party agency.
- Electrical Permit: Covers all wiring, connections, dedicated circuits, and safety disconnects, ensuring work is done by a licensed electrician and meets electrical codes.
- Zoning Permit/Review: This confirms the exterior structure complies with local zoning ordinances regarding setbacks (distance from property lines), height restrictions, lot coverage (how much of your lot is covered by structures), and use (ensuring it's an allowed accessory structure). Exterior structures often have specific rules.
Architectural and Engineering Plans: Detailed, stamped plans prepared by a licensed architect and/or structural engineer are usually required for permit applications. These plans show:
- Foundation design.
- Hoistway (shaft) construction details, including materials and dimensions.
- Structural calculations to ensure the shaft and its connection to the house can handle loads (including wind and potentially seismic loads).
- Modifications to the existing house structure (e.g., new door openings, weatherproofing).
- Elevator specifications integration.
Homeowners Association (HOA) Approval: If your home is part of an HOA, you MUST get their approval before starting any work. HOAs often have strict rules about exterior modifications, materials, and aesthetics. Submitting your detailed plans is typically required. Failure to get HOA approval can lead to fines and forced removal of the structure.
Phase 3: Construction – Bringing Your Elevator to Life
With permits and approvals in hand, construction can begin. This is typically managed by a licensed general contractor (mobility123) working in coordination with the elevator installation company.
Site Preparation:
- The designated area is cleared.
- Excavation for the elevator pit (the space below the lowest landing) and foundation begins. The pit depth depends on the elevator type.
- Concrete is poured for the foundation and pit floor, ensuring a level and robust base.
Hoistway (Shaft) Construction: This is the vertical enclosure for the elevator. For exterior applications, materials must be durable and weather-resistant. Common options include:
- Concrete Masonry Units (CMU/Block): Very durable, strong, and fire-resistant.
- Steel Frame: A structural steel frame is erected, which is then clad with exterior finishing materials.
- Wood Frame: Similar to standard home construction, using weather-resistant sheathing and finishes.
- Critical Considerations:
- Weatherproofing: Proper flashing, sealing, and potentially insulation are vital to protect the elevator components and prevent water intrusion into the home.
- Exterior Finish: The hoistway exterior should ideally match or complement your home's existing siding, brick, stucco, or other finishes for aesthetic integration. This might be dictated by HOA rules.
- Fire Resistance: Shaft materials must often meet specific fire-resistance ratings per code.
Creating Access Points: Openings are carefully cut into the existing exterior wall at each level where the elevator will stop. These openings are structurally framed, weatherproofed, and prepared for the elevator landing doors.
Elevator Component Installation: Licensed elevator technicians install the core components within the completed hoistway:
- Guide rails for the cab to travel along.
- The elevator cab (car) itself.
- Drive system (hydraulic piston/pump unit, traction motor/counterweight, etc.).
- Wiring for controls, lighting, and safety features.
- Landing doors and call buttons.
Electrical Work: A licensed electrician runs dedicated power circuits from your home's main panel to the elevator's controller and machine components. Safety disconnects are installed as required by code.
Finishing Touches:
- Exterior: Siding, brick, or stucco is applied to the hoistway exterior. Gutters and drainage may be adjusted.
- Interior Landings: The new doorways connecting the house to the elevator shaft are finished with trim, flooring transitions, and paint to match your home's interior.
- Cab Interior: You can customize the elevator cab's interior with various flooring, wall panel, lighting, and handrail options.
- Landscaping: Any disturbed landscaping around the construction area is restored.
Phase 4: Inspection, Commissioning, and Handover
This final phase ensures safety and proper operation.
Inspections: The installation undergoes rigorous inspections by:
- The local building inspector (structural, electrical).
- A certified elevator inspector (mandated by the elevator permit). They verify compliance with all safety codes (ASME A17.1), testing emergency brakes, door interlocks, communication devices (emergency phone), leveling accuracy, and more.
Commissioning: The elevator technicians perform final tests and adjustments to ensure smooth, reliable operation.
Handover & Training: Once all inspections are passed, the elevator is officially handed over to you. The installation team will provide thorough training on how to operate the elevator safely, use its features (including emergency procedures), and understand maintenance requirements.
Timeline Considerations
The entire process, from initial consultation to final handover, can take several months. Key factors influencing the timeline include:
- Permitting & Approval Delays: Local government and HOA review times can vary significantly.
- Elevator Manufacturing Lead Time: Custom elevators take time to build (often 4-8 weeks or more).
- Contractor Availability: Scheduling the various trades involved.
- Weather: Exterior construction is weather-dependent.
- Project Complexity: Number of stops, site challenges, extent of home modifications.
While the actual on-site construction of the shaft and elevator installation might take several weeks (with the elevator mechanical installation itself potentially taking around a week or two), the preparatory and administrative phases often take the longest.
Ongoing Maintenance
A home elevator is a complex machine requiring regular professional maintenance for safety, reliability, and longevity. Most manufacturers and reputable installers offer service contracts. Regular check-ups (typically annually or semi-annually) ensure all safety features are functional and components are in good working order.
Elevating Your Home's Value
Beyond the immense lifestyle benefits of accessibility and convenience, installing a residential elevator, particularly one thoughtfully integrated into the exterior, is a significant home improvement that can increase your property's value.
- Increased Market Appeal: It broadens your home's appeal to a wider range of potential buyers, including those planning for aging in place, families with members who have mobility challenges, or those simply seeking luxury and convenience. Less than 5% of US homes have enhanced accessibility features, creating a demand advantage.
- Higher Resale Price: Studies and real estate data suggest that homes with elevators can sell for a premium compared to similar homes without them. While estimates vary by market and property specifics, increases of 10% or even up to 25% have been noted.
- Competitive Advantage: In the real estate market, an elevator is a standout feature that distinguishes your property.
- Return on Investment (ROI): While not always guaranteed to recoup 100% of the cost (which can range significantly, often 35,000−100,000+ depending on complexity), a well-maintained elevator adds tangible functional and desirable value that buyers recognize.
Final Details
Installing an exterior residential elevator on an existing home is a substantial project, but one that offers profound benefits. It requires careful planning, navigating administrative processes like permitting and zoning, skilled architectural design and engineering, and expert construction and installation. By working with experienced professionals like Mobility123, you can ensure the process is managed effectively from start to finish.
The result is not just barrier-free access between floors; it's enhanced independence, the ability to age comfortably in your beloved home, added daily convenience, and a significant investment that can boost your property's overall value and marketability.
Ready to explore how an exterior home elevator can elevate your lifestyle?
Contact Mobility123.com today for a free consultation!
